Publish Web Server in Linux using SSL/TLS
2. Create VPN Account
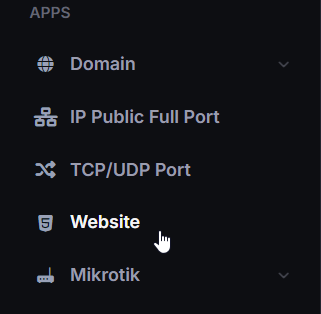
- Select the Website menu.
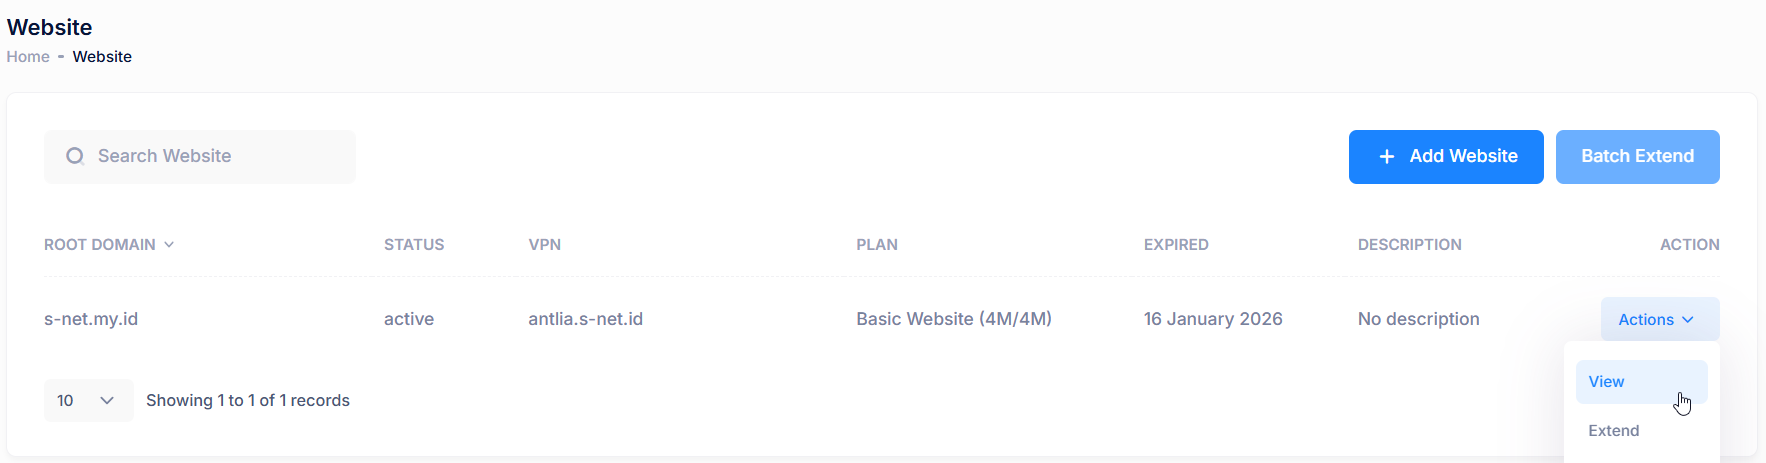
- In the Website list, click Action then click View.
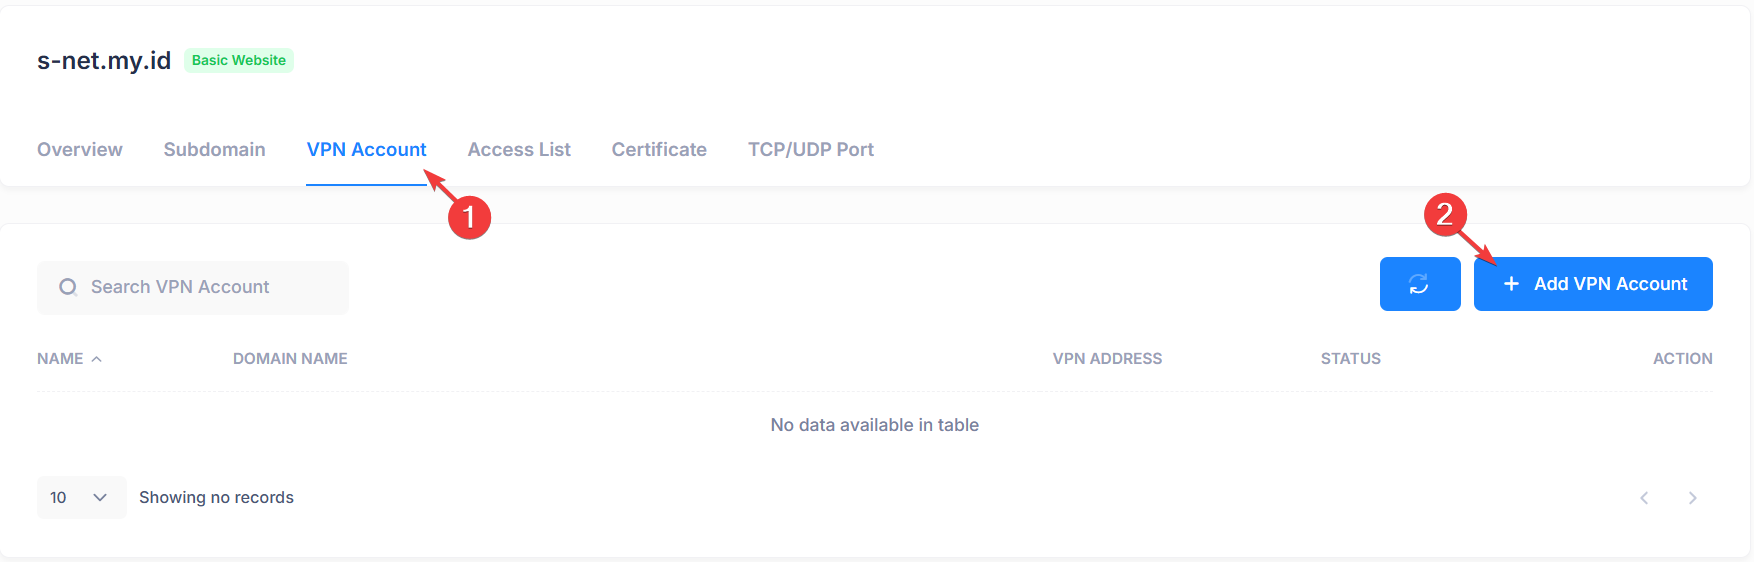
- Select VPN Account tab then click Add VPN Account to create new VPN Account.
- Input username and password then click Save.
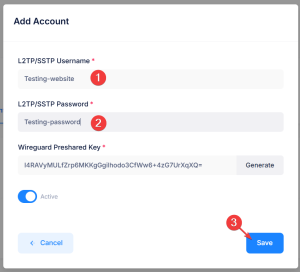
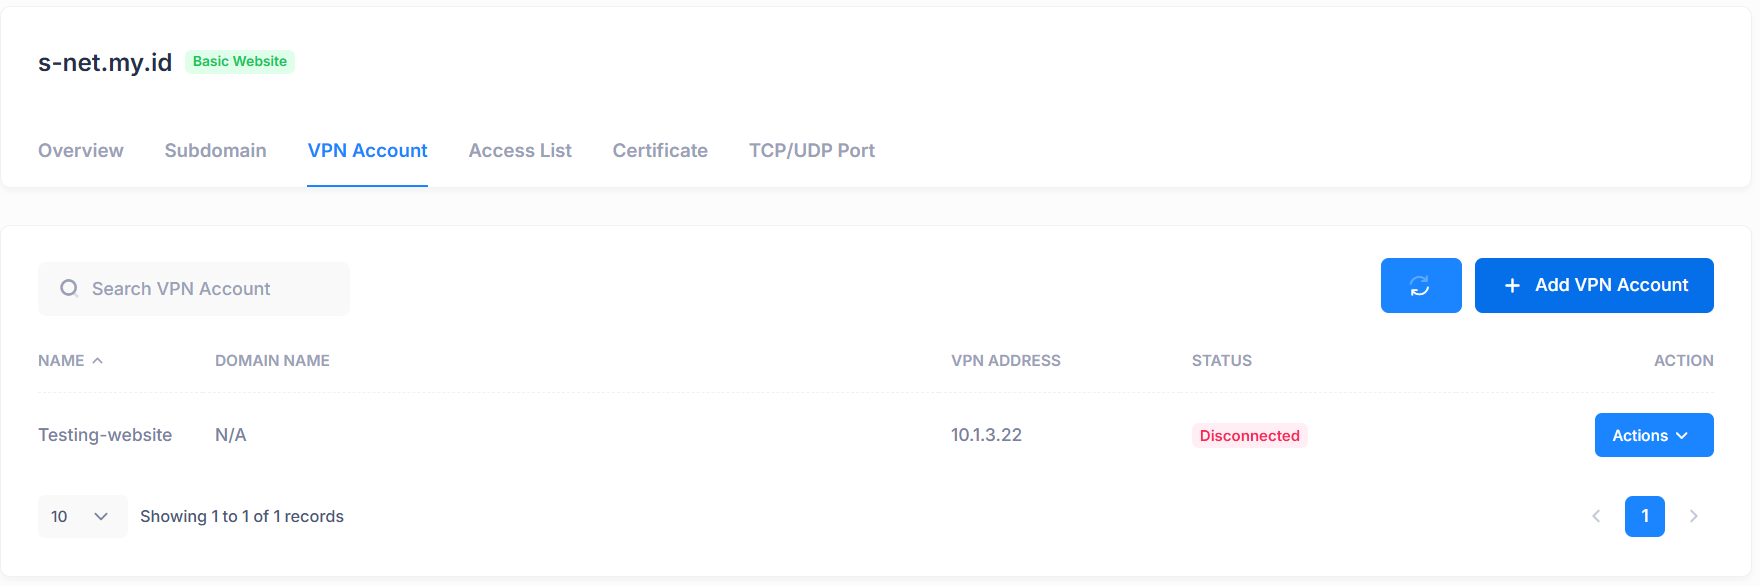
- VPN Account successfully created.
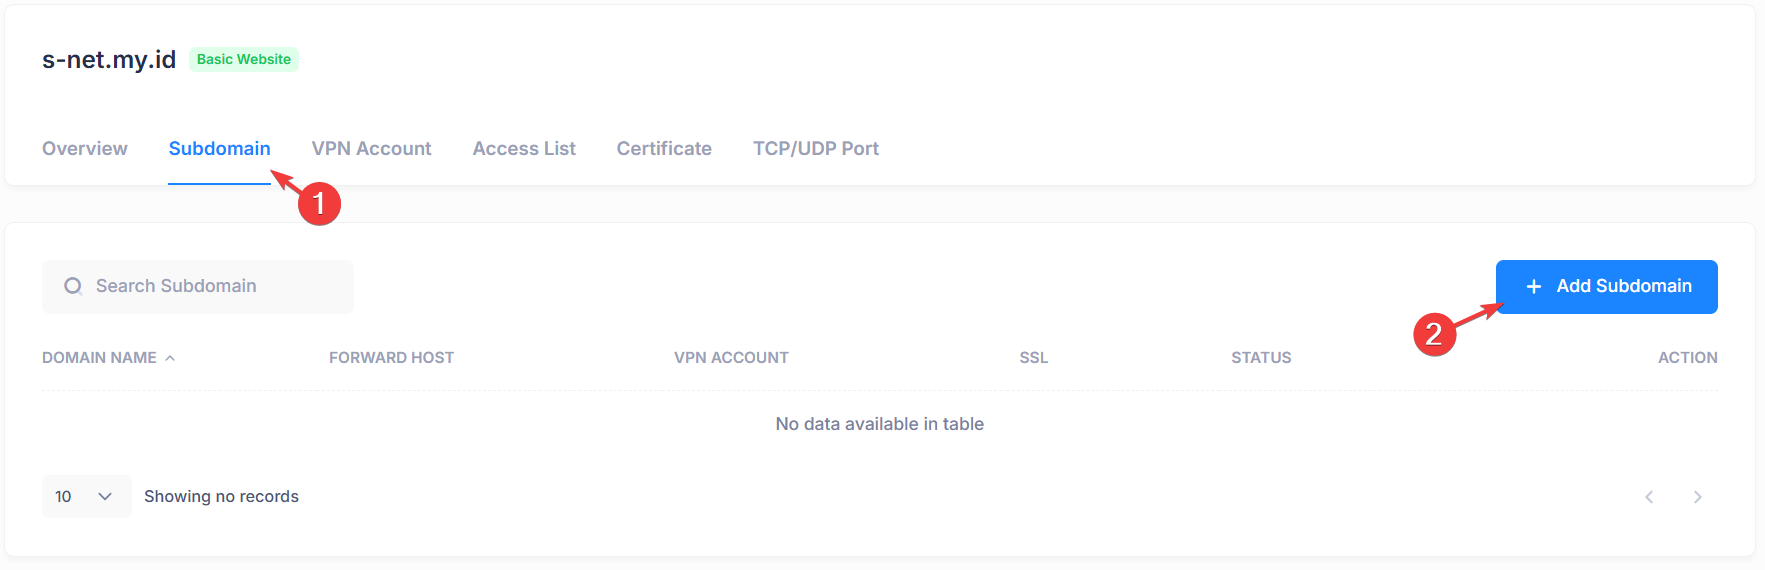
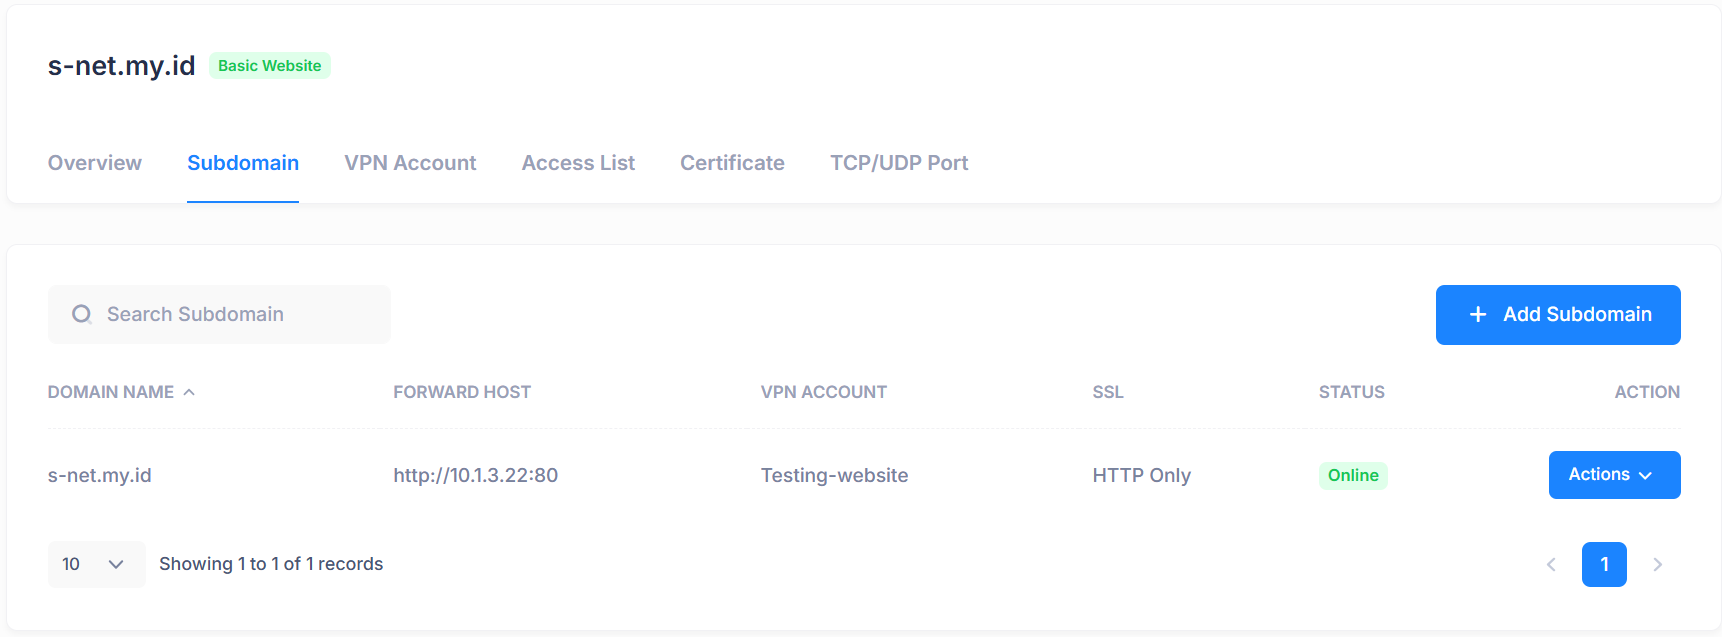
3. Add Root Domain or Subdomain
- Select the Subdomain tab, then click Add Subdomain to create new Subdomain.
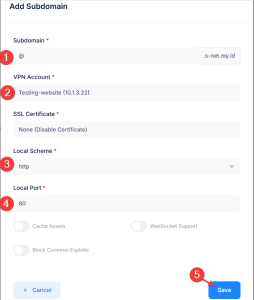
Add subdomain, example use @ for root domain then select VPN Account, local scheme and local port (example use 80 for default http port) then click Save.
- Root domain or subdomain successfully created.
4. Generate SSL Certificate
- In the Certificate tab, click Add Certificate to create a new certificate.
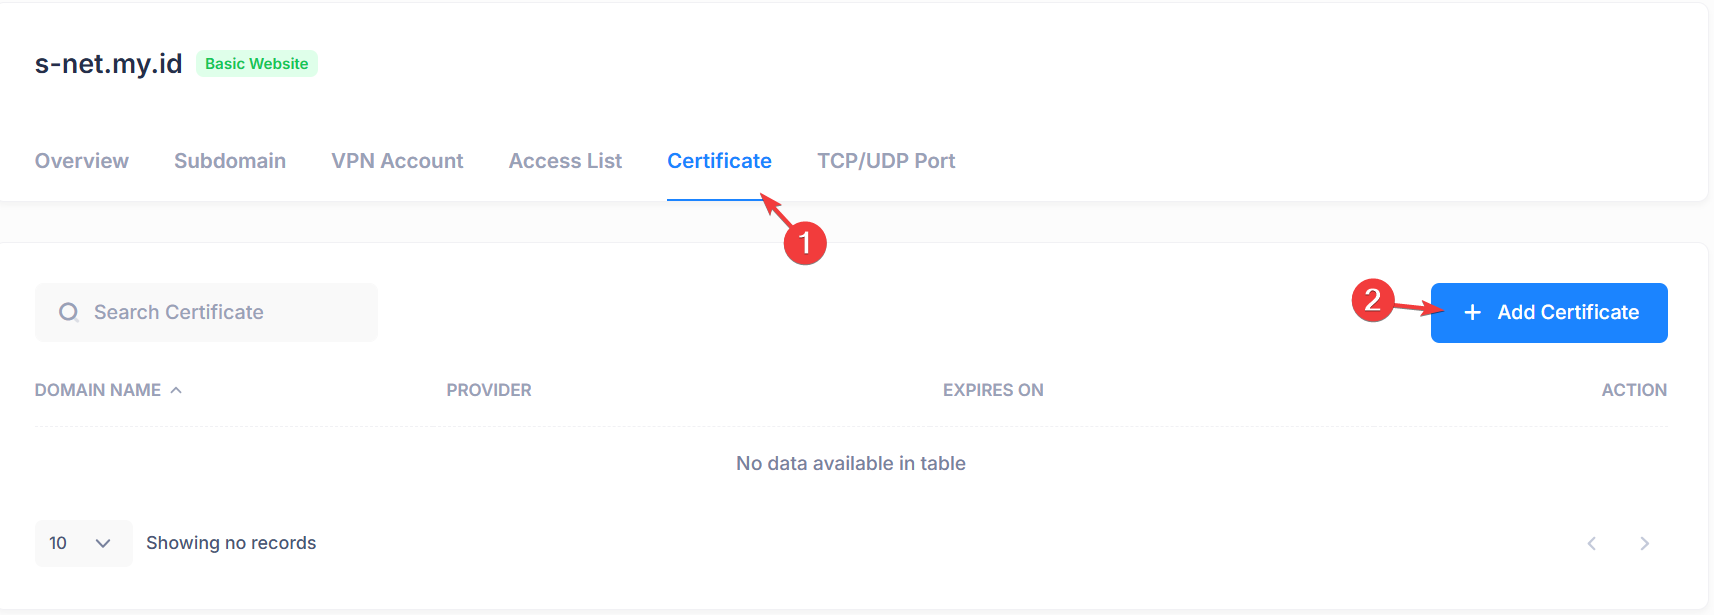
- Select SSL Certificate Mode to generate and choose the Subdomain for which the certificate will be created. Then click Add Certificate.
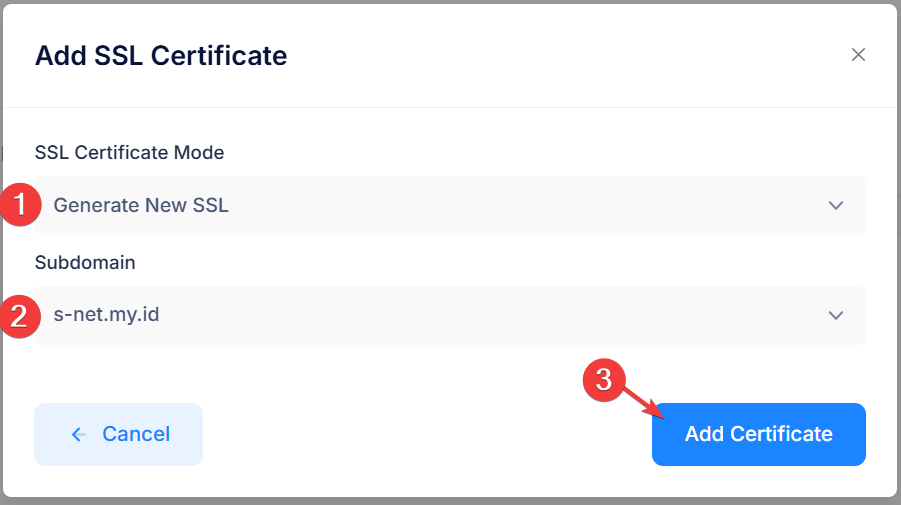
*Sometimes propagation takes time for the certificate generation to succeed - New SSL/TLS Certificate successfully created.

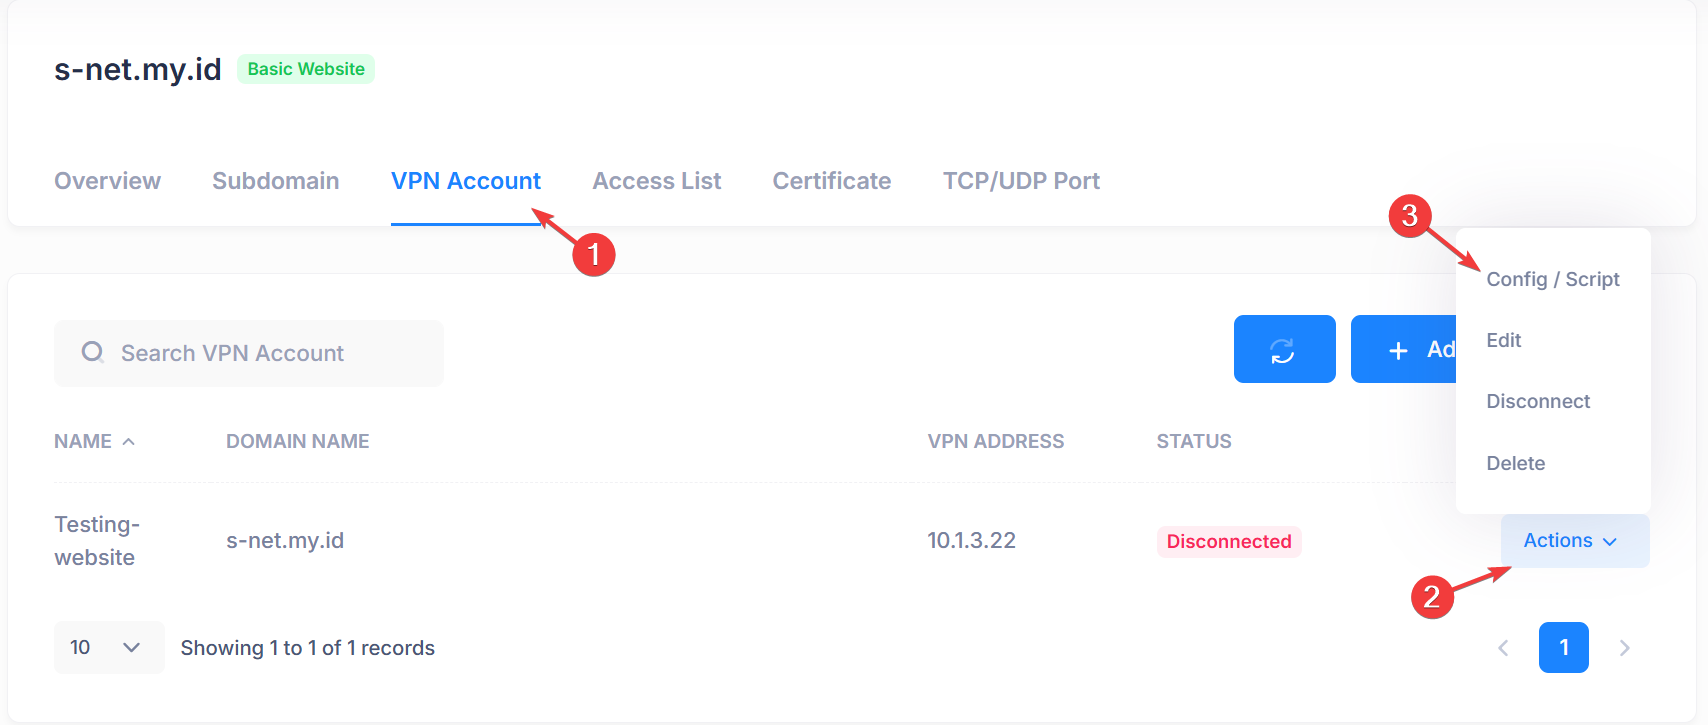
3. Connecting VPN Account
We recommend using WireGuard on Ubuntu to connect to your VPN account:
- Install WireGuard using this link. WireGuard Installation Guide for Linux
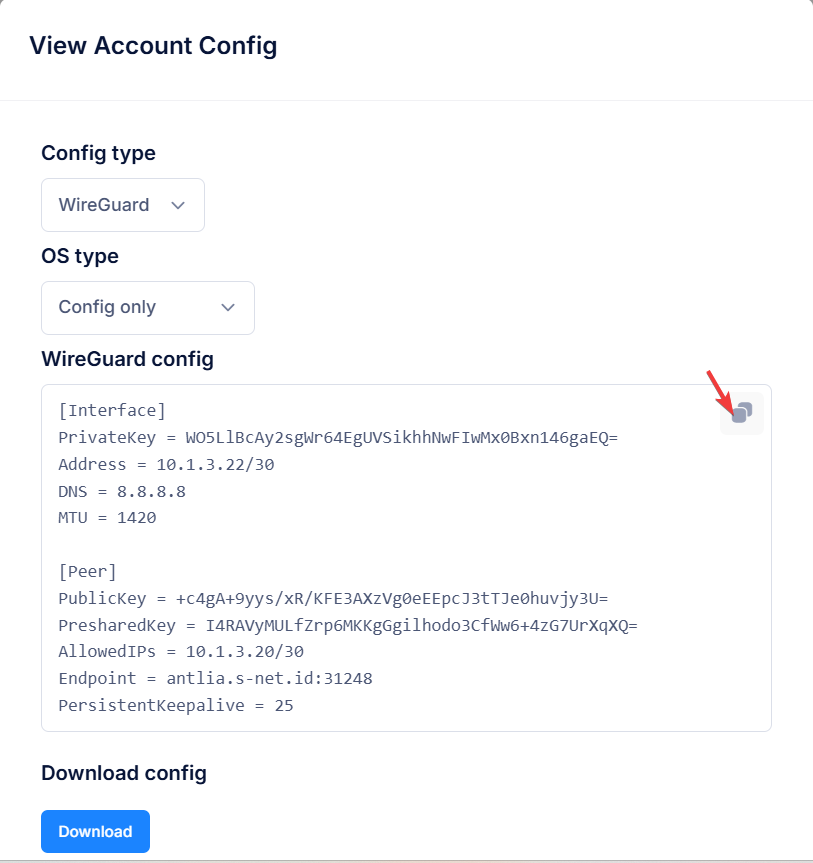
- In the VPN Accounts tab, click Action and then click Config/Script.
- Select Wireguard config type then click copy icon to copy config text.
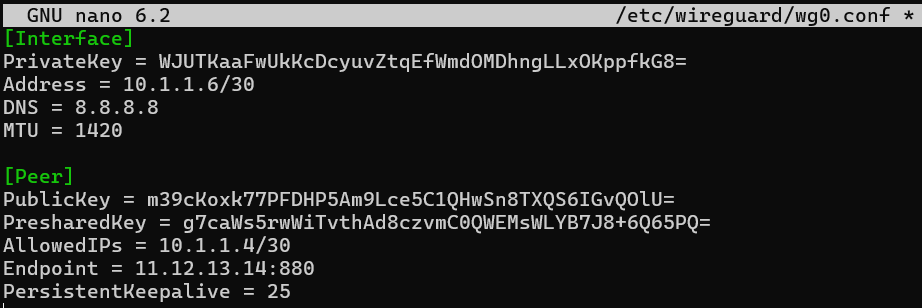
- Create a WireGuard config file:
- Start the VPN connection and enable auto start:
sudo nano /etc/wireguard/wg0.confPaste your copied configuration inside this file, then press Ctrl + O to save and Ctrl + X to exit.
sudo wg-quick up wg0 && sudo systemctl enable wg-quick@wg06. Accessing Domain / Subdomain
- In the Subdomain tab, copy domain / subdomain which status is online

- Access domain or subdomain using browser