Publish Web Server in Windows
2. Enable VPN Server
- Select the IP Public Full Port menu.
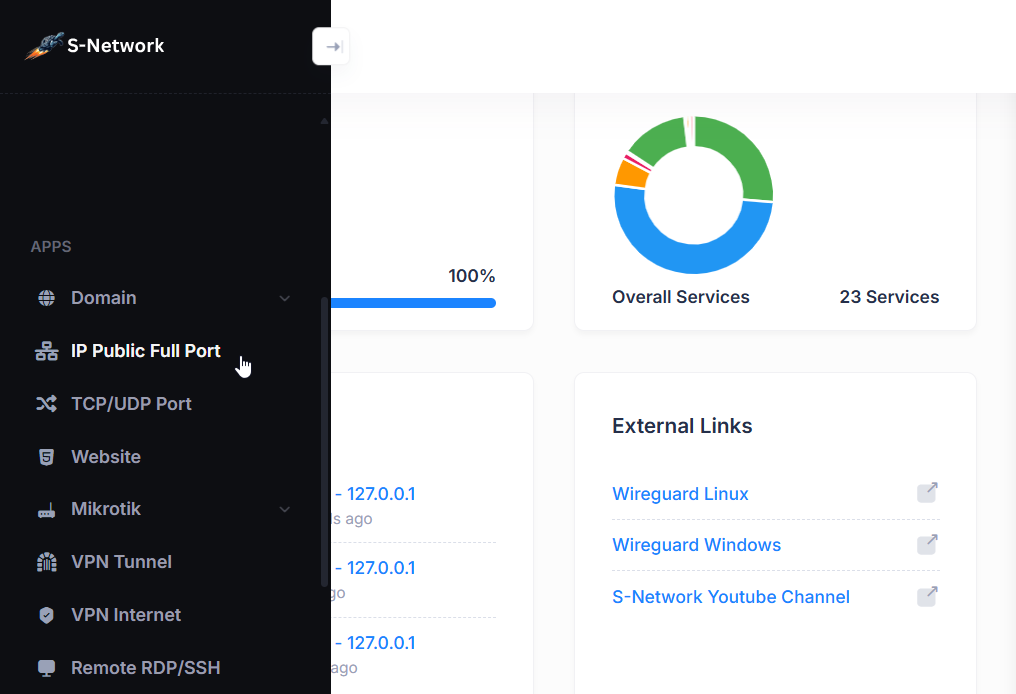
- Select VPN Setting tab.

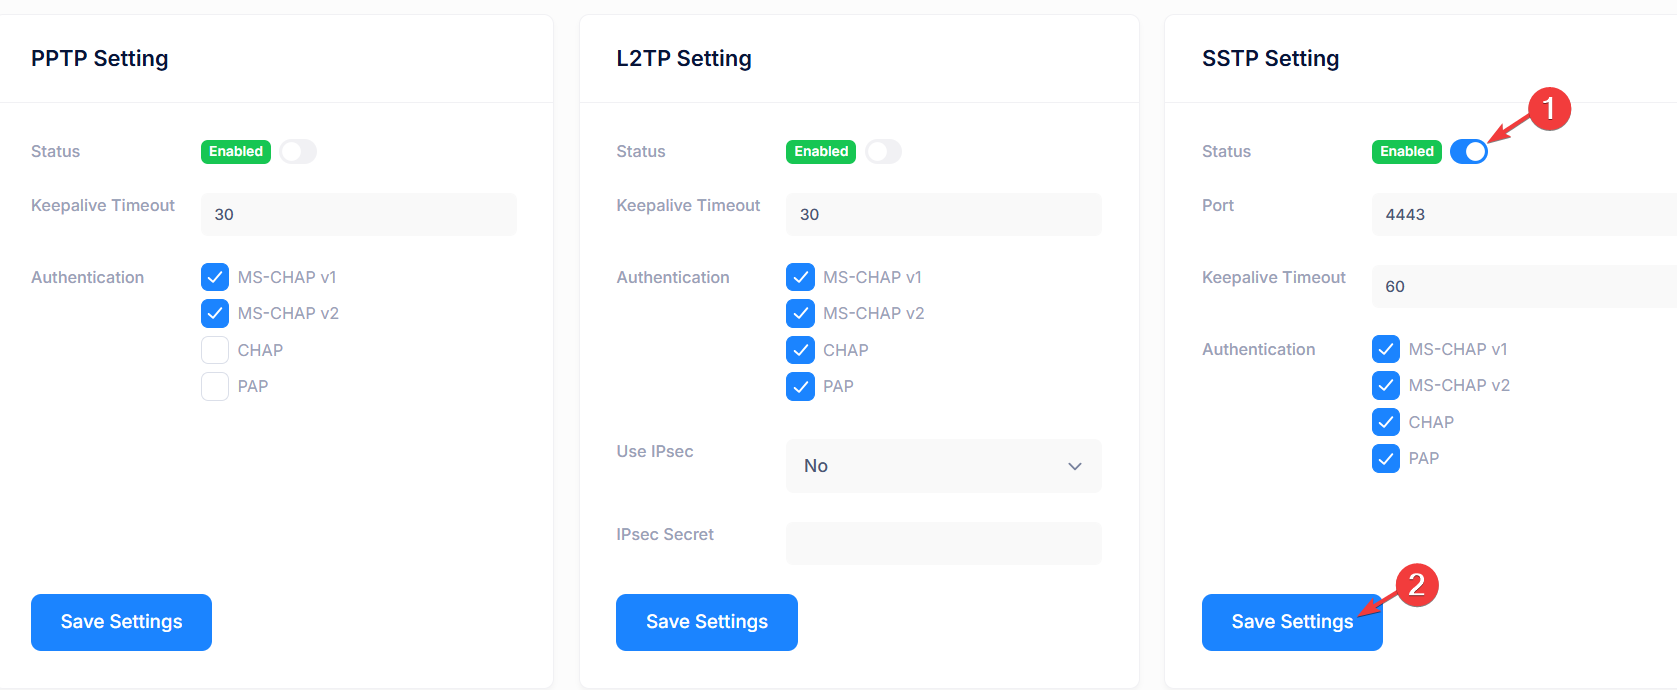
- Enable desired VPN Protocol then click Save Setting.
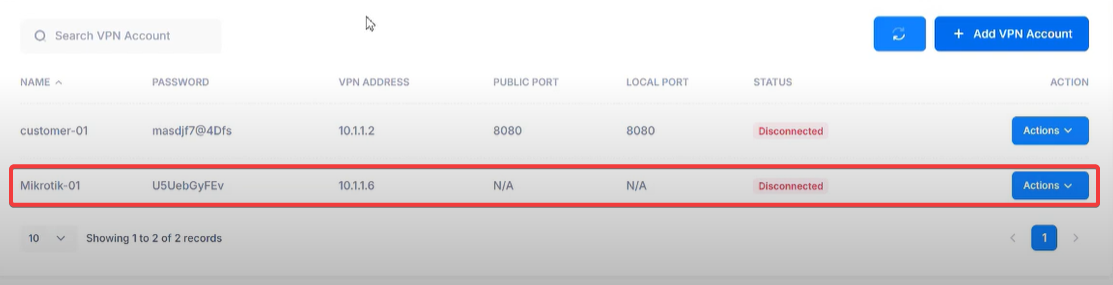
3. Create VPN Account
- In the IP List, click Actions then click View

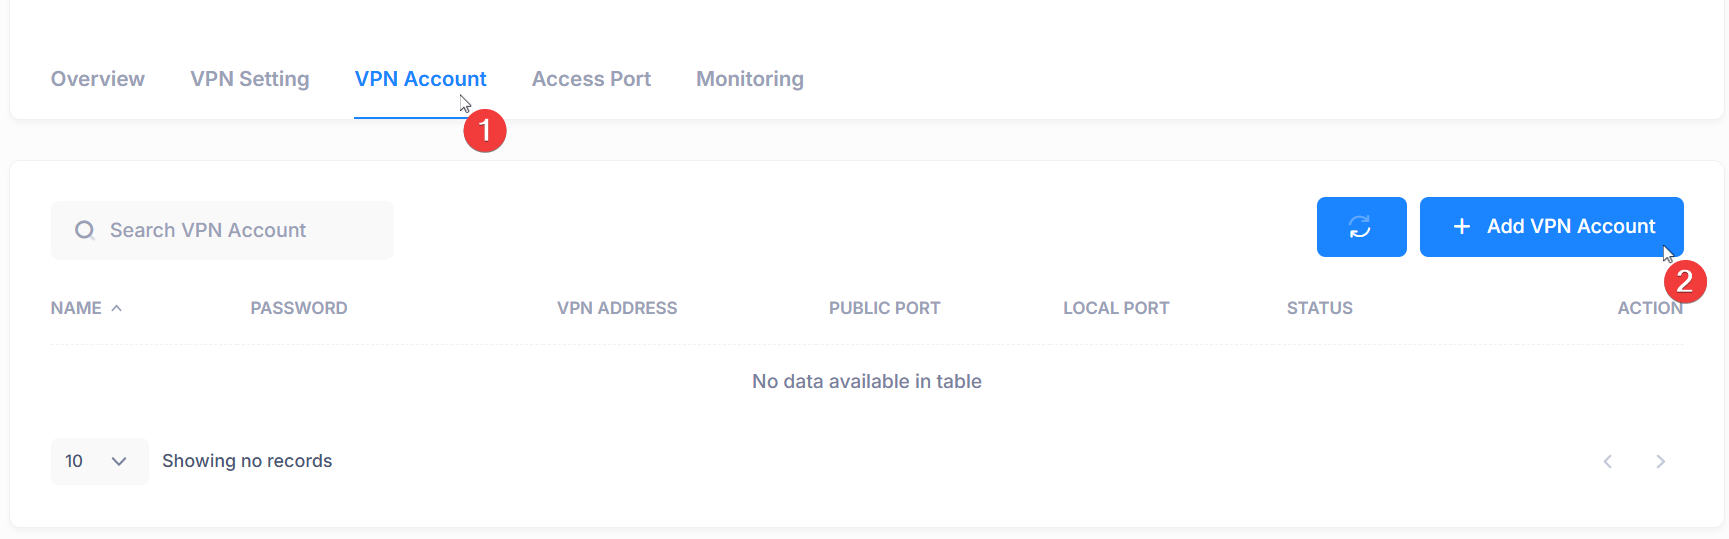
Add a new account by selecting the VPN Account tab, then clicking Add VPN Account.
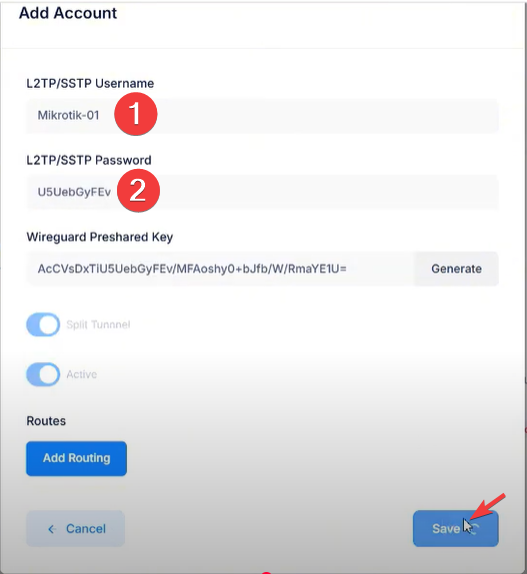
Enter your desired username and password, then click Save.
- The new VPN account has been successfully created.
4. Connect VPN Account
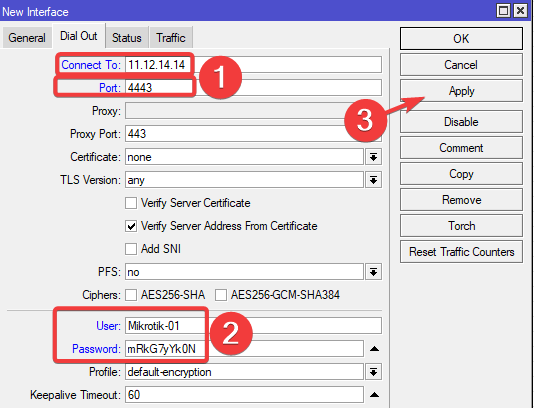
- Open Winbox and access your MikroTik router. Go to the PPP menu, click the “+” button, then select SSTP Client.

- Copy your IP Public into the Connect To field, and input SSTP Port, then copy the username and password. After that, click Apply.
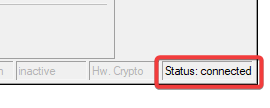
- Make sure the VPN client is successfully connected, indicated by the “connected” status at the bottom right.
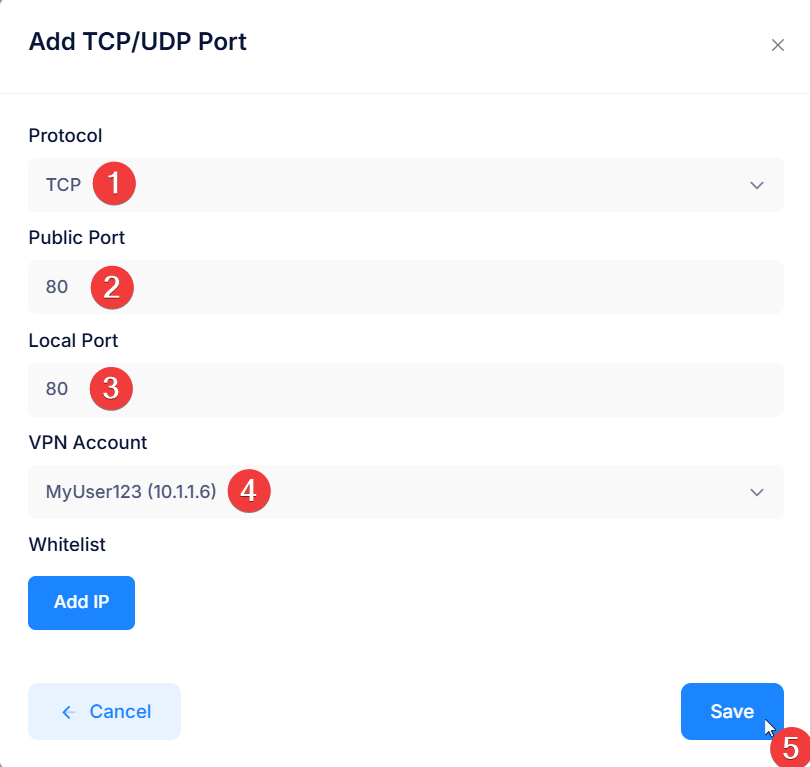
5. Add Access Port
Add a port access by clicking the Access Port tab, then selecting Add Access Port.
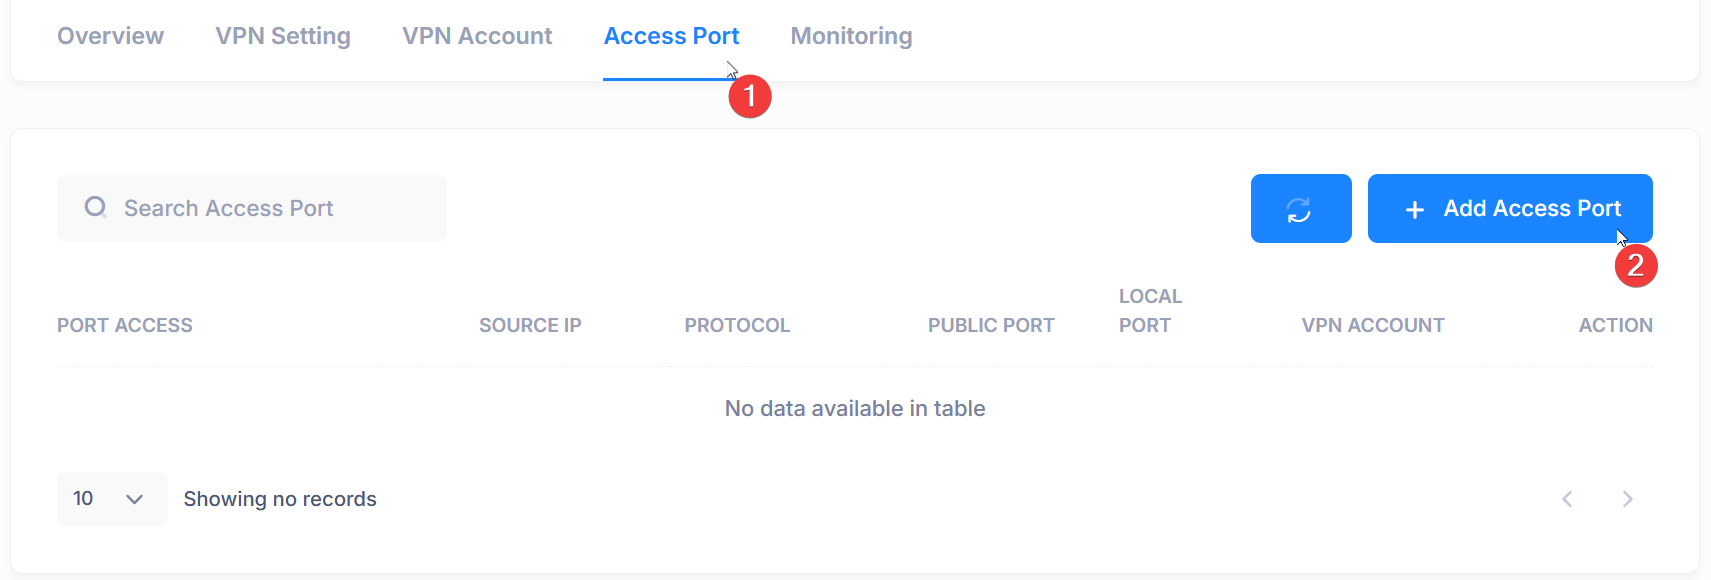
Choose either the TCP or UDP port, then select Local Port 80 and Public Port 80. Also, choose the VPN account to which port 80 will be forwarded, and click Save.
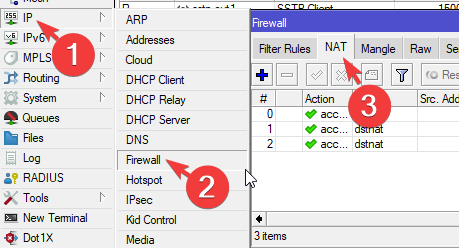
6. NAT / Port Forwarding
- Go to IP -> Firewall -> NAT
- Click + to Add new Firewall Rule. In General tab, select dstnat, protocol, dst port and In.Interface then click Apply
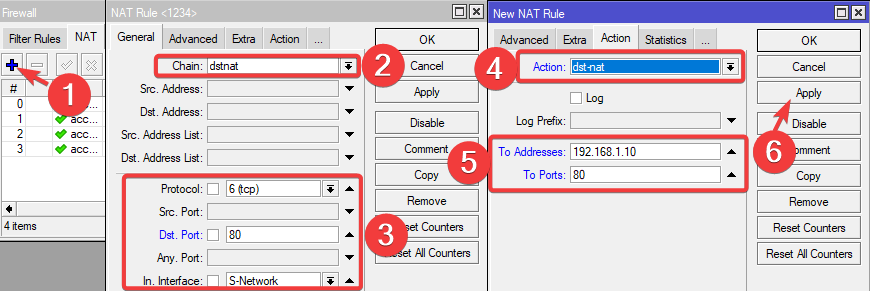
Dst.Port = Public port to be published
To.Address = IP of local server or local device
To.Ports = Number port of local server or local device
