Publish Web Server in Windows using SSL/TLS
Estimated reading: 2 minutes
260 views
1. Install XAMPP and start services (Skip if not needed)
Install a Web Server Stack
Download and install a web server bundle like XAMPP or WampServer. These packages include Apache (web server), PHP (scripting language), and MySQL (database).Start the Server Services
Launch the XAMPP/WAMP control panel and start the Apache and MySQL services.Place Your Website Files
Navigate to the
htdocsfolder (for XAMPP) orwwwfolder (for WAMP).Copy your website files (e.g.,
index.html,index.php) into this folder.
Access Your Website Locally
Open a browser and go to:
2. Create VPN Account
- Select the Website menu.
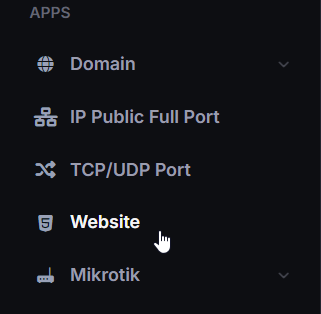
- In the Website list, click Action then click View.

- Select VPN Account tab then click Add VPN Account to create new VPN Account.

- Input username and password then click Save.
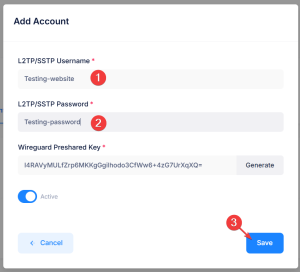
- VPN Account successfully created.

3. Add Root Domain or Subdomain
- Select the Subdomain tab, then click Add Subdomain to create new Subdomain.

Add subdomain, example use @ for root domain then select VPN Account, local scheme and local port (example use 80 for default http port) then click Save.
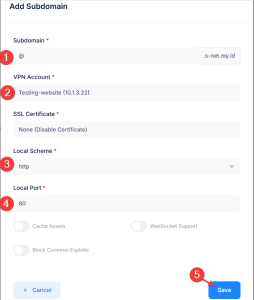
- Root domain or subdomain successfully created.
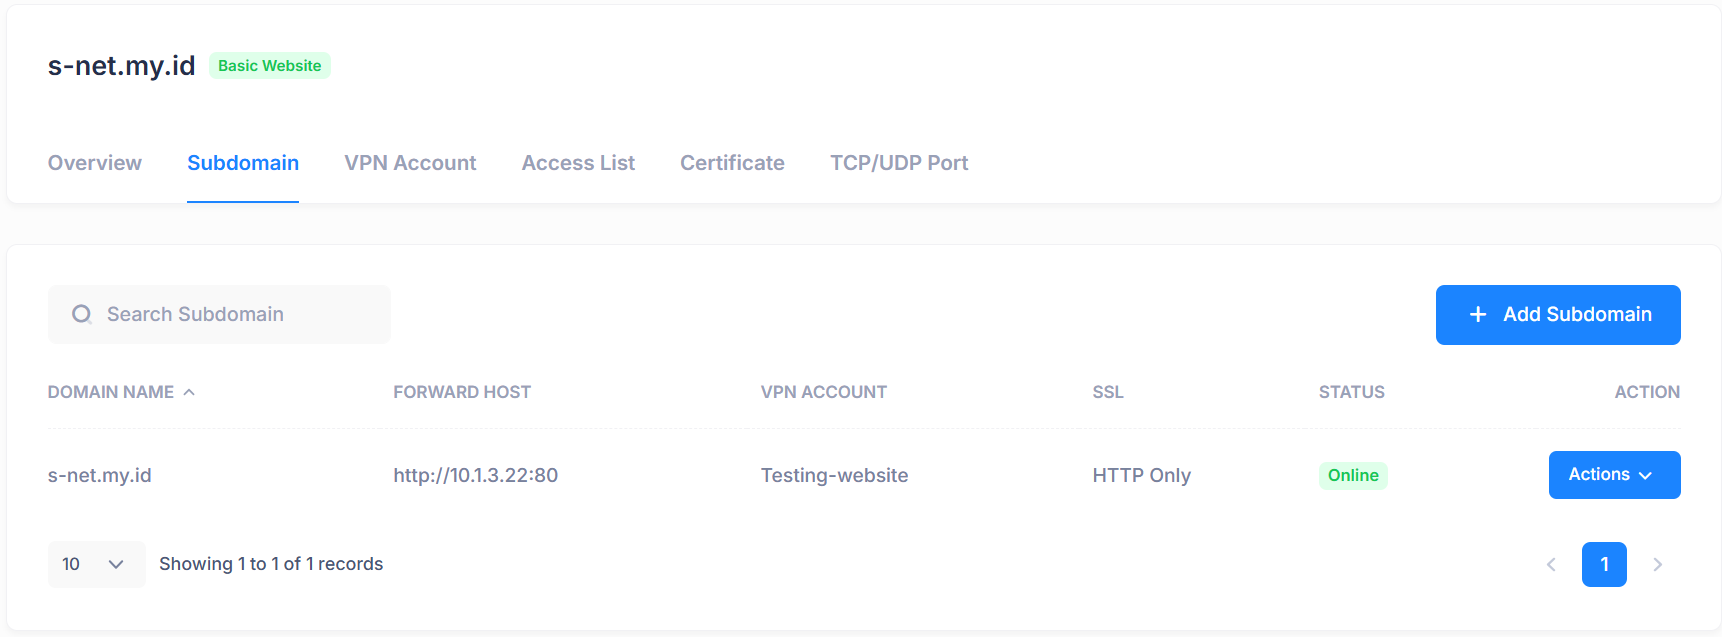
4. Generate SSL Certificate
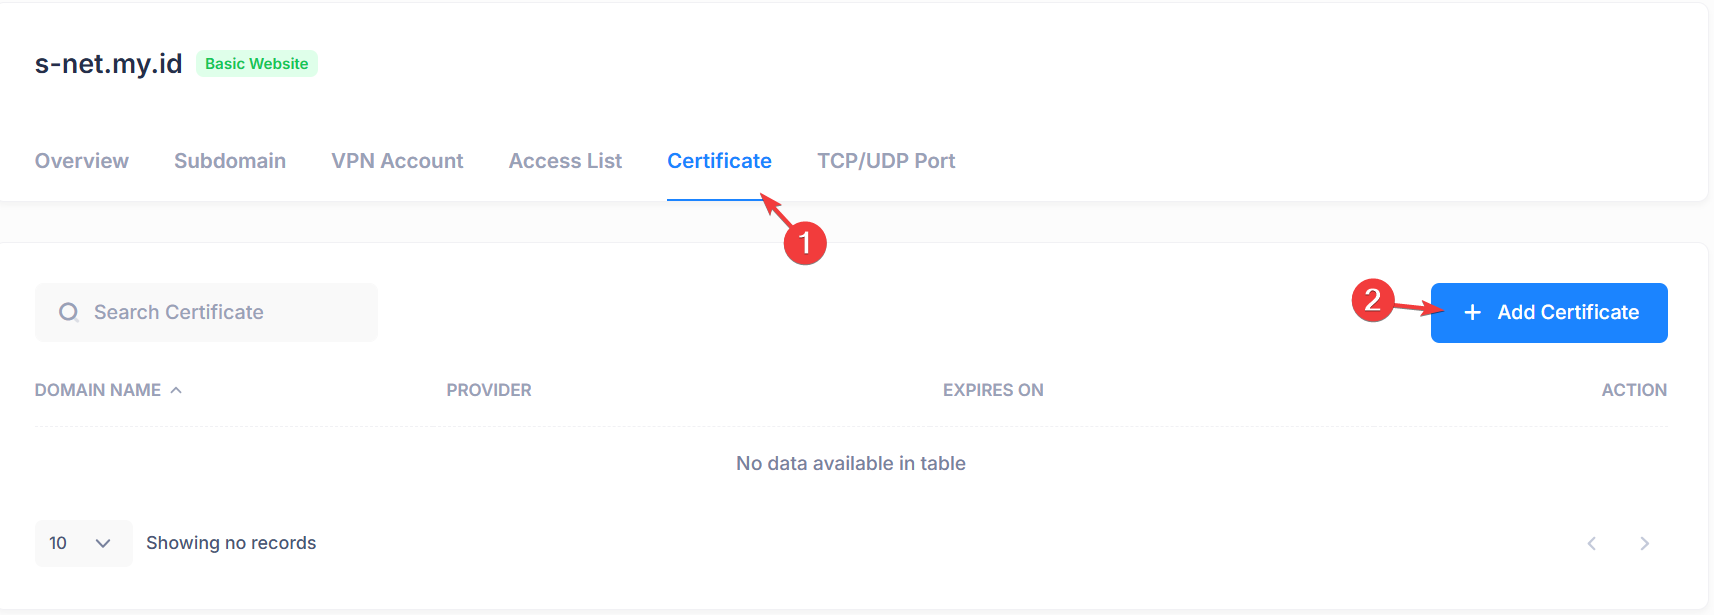
- In the Certificate tab, click Add Certificate to create a new certificate.
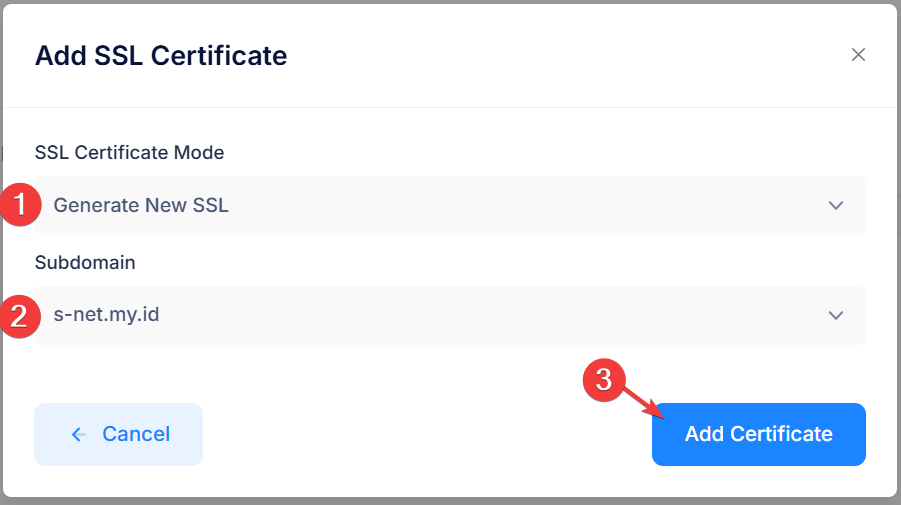
- Select SSL Certificate Mode to generate and choose the Subdomain for which the certificate will be created. Then click Add Certificate.
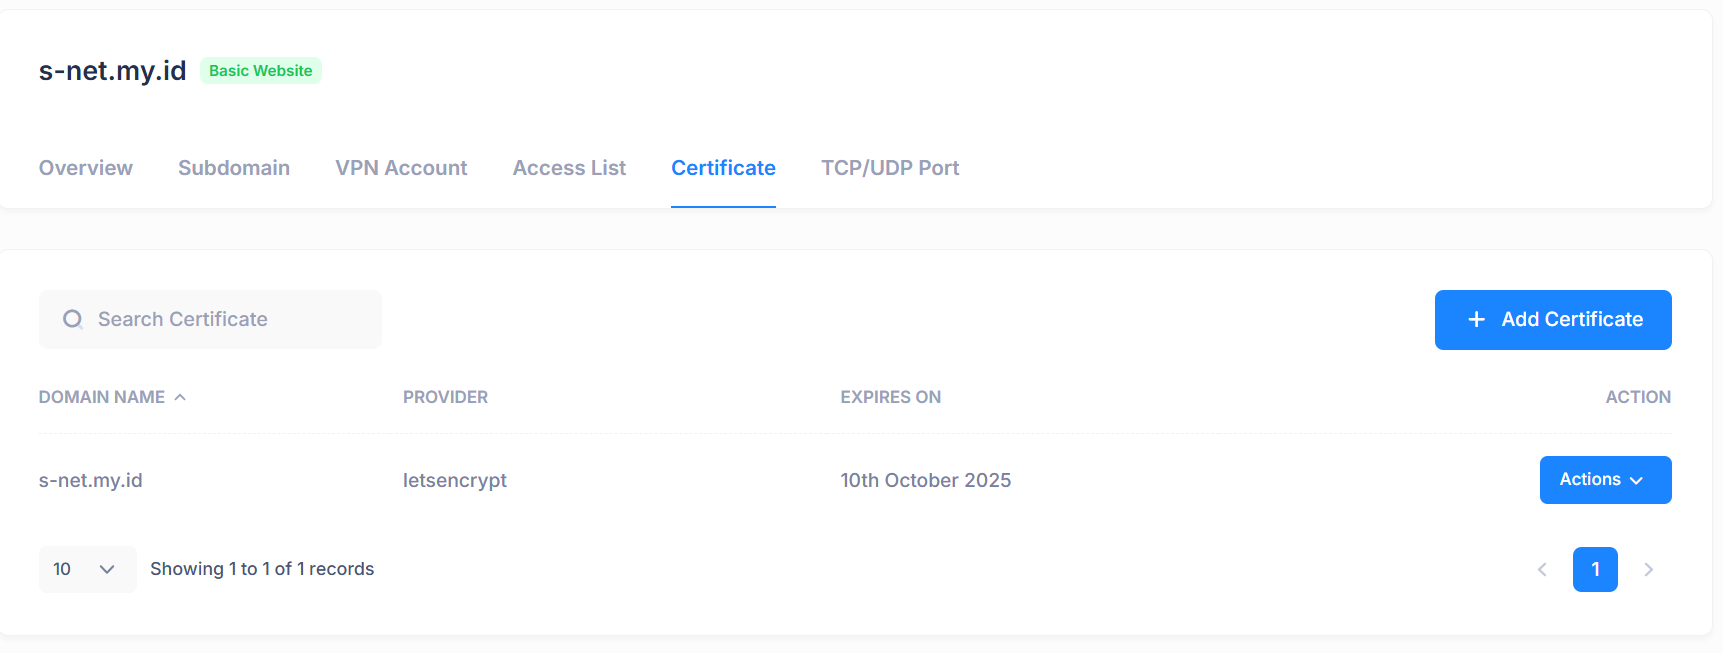
*Sometimes propagation takes time for the certificate generation to succeed - New SSL/TLS Certificate successfully created.
5. Connecting VPN Account
Via Windows Wireguard
- In the VPN Accounts tab, click Action and then click Config/Script.
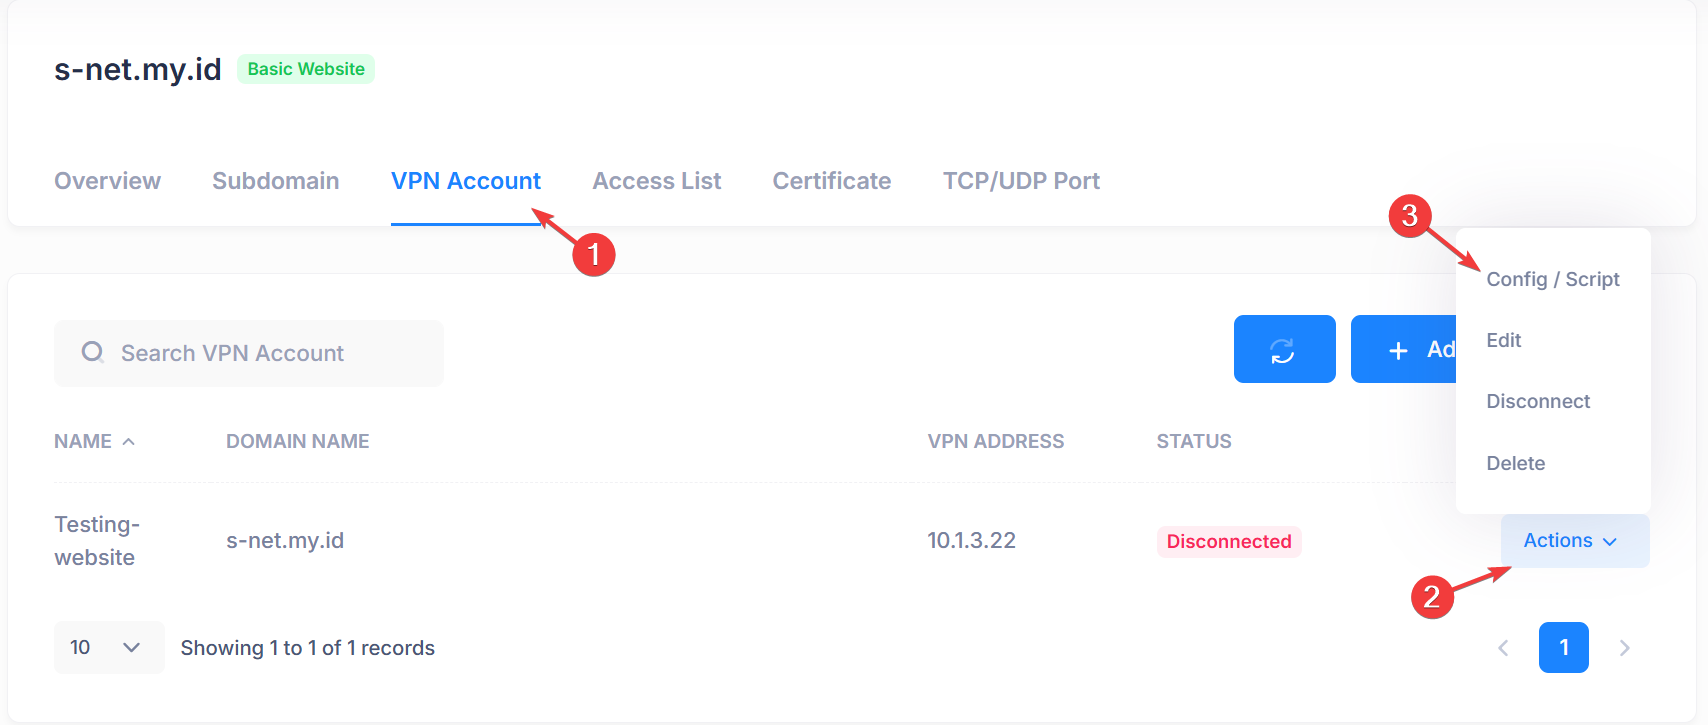
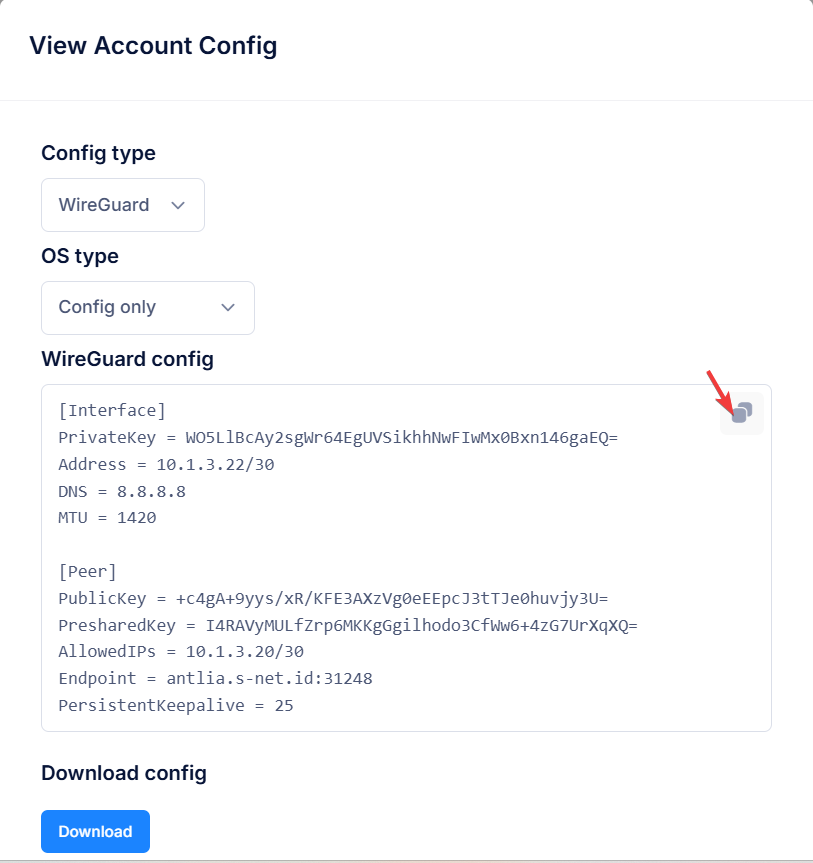
- Select Wireguard config type then click copy icon to copy config text.
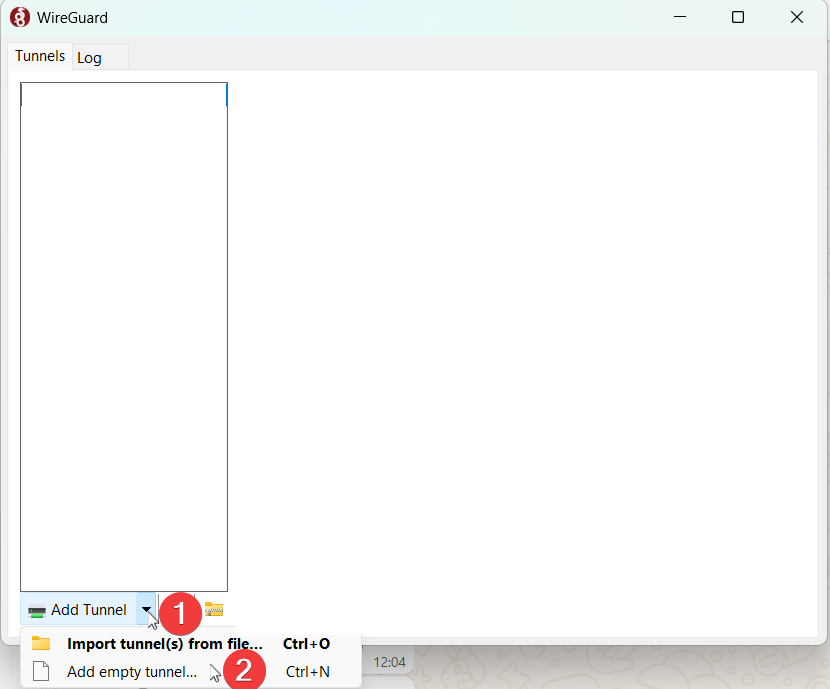
- Open wireguard application, click Add Tunnel then click Add empty tunnel
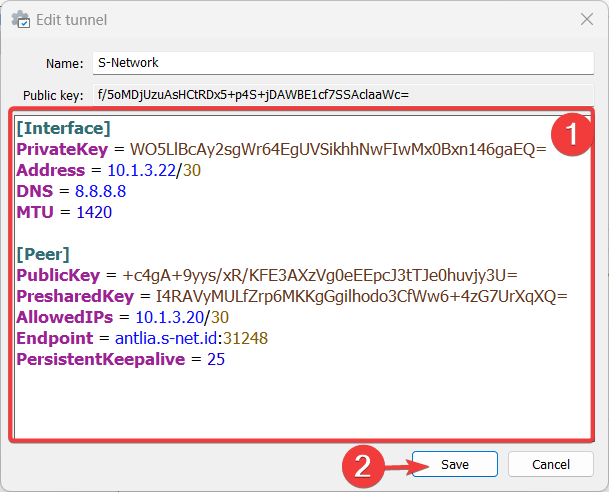
- Paste name and config here then click Save.
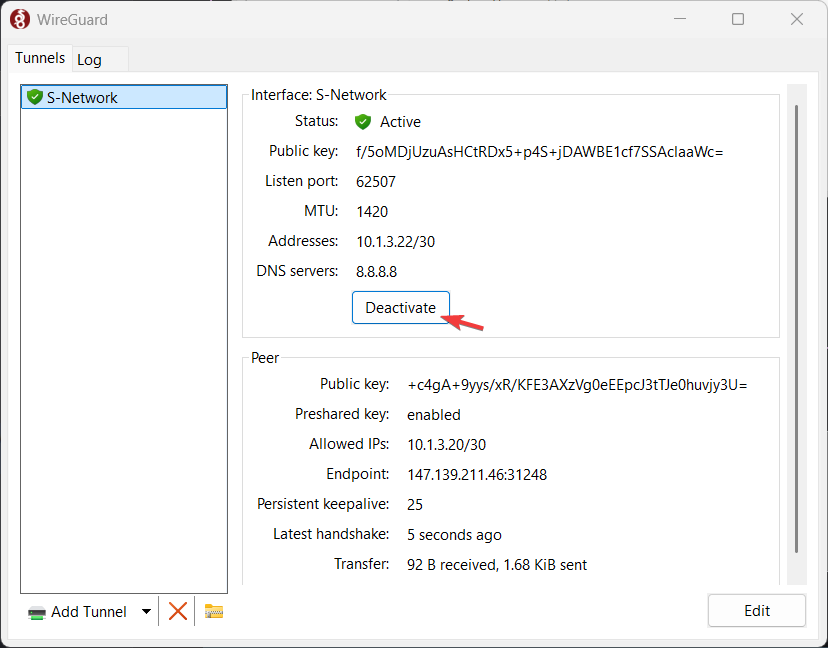
- Click Activate to connect to the vpn
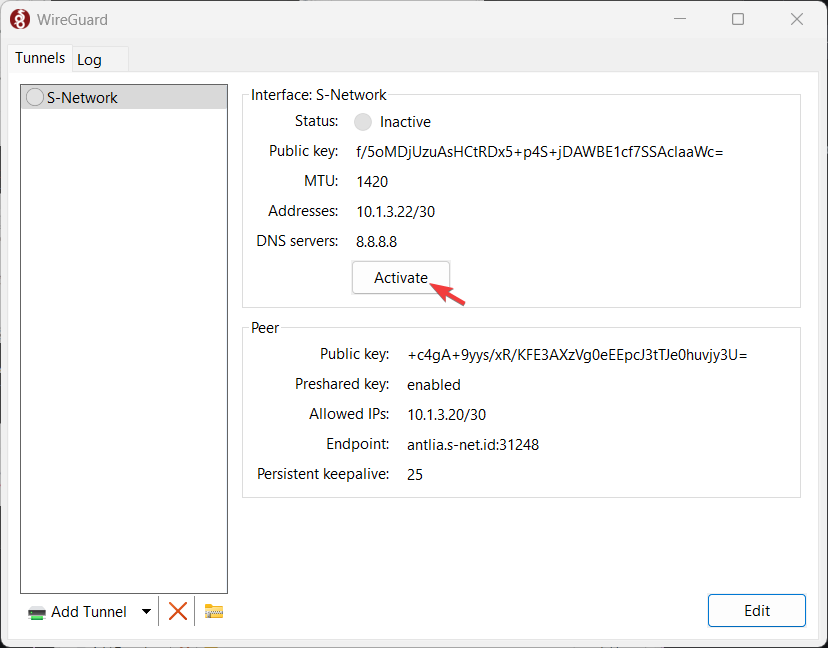
- Wireguard VPN is successfully connected if the latest handshake is present.
Via Windows VPN
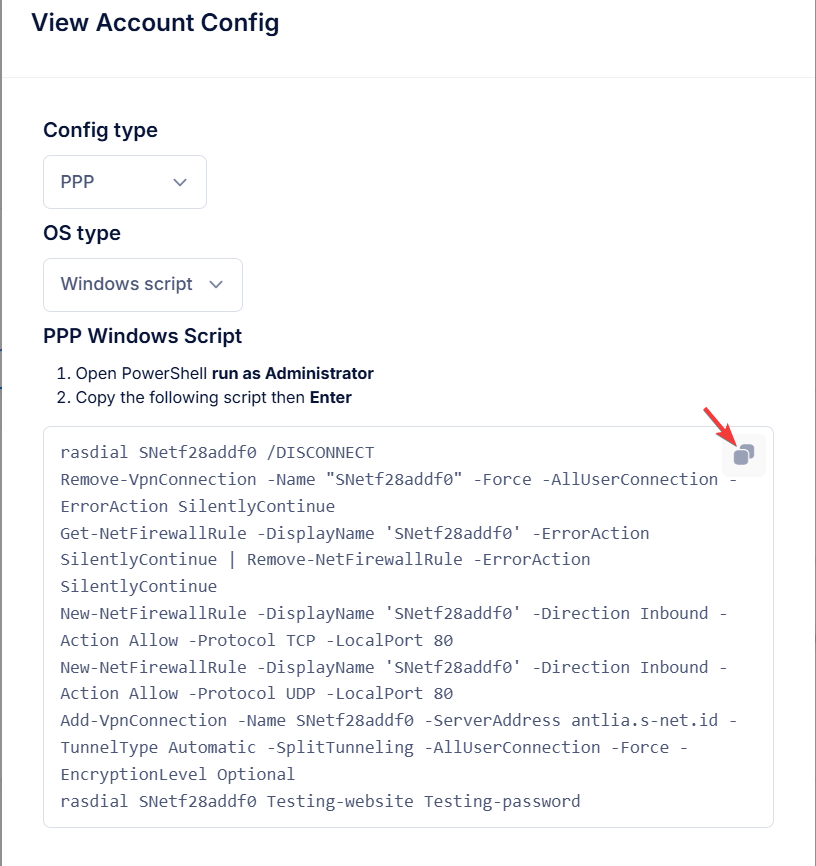
- In the VPN Accounts tab, click Action and then click Config/Script.

- Select PPP config type then click copy icon to copy config text.
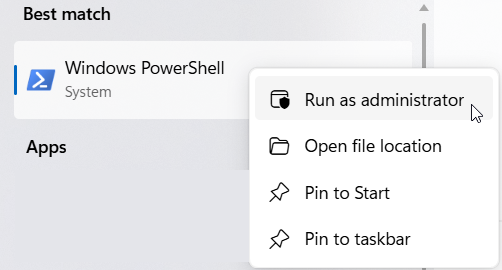
- Open Windows Powershell run as Administrator.
- Right-click to paste the script into PowerShell, wait until the script is fully pasted then hit Enter.
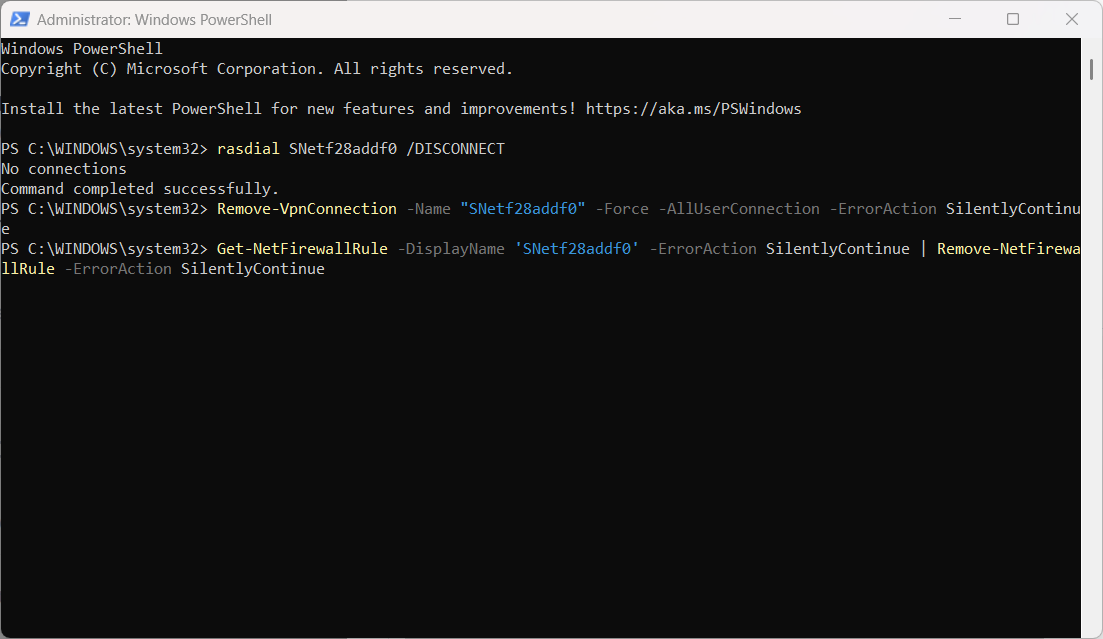
- VPN connected successfully.

